These Key Lime Pie Bars bring a burst of tangy sweetness in every bite! Their bright flavor comes from fresh key lime juice, paired with a buttery crust that’s just so good.
Making these bars is a breeze! Just mix, bake, and chill. They’re perfect for summer parties, or just when you need a little sunshine on your plate. Trust me, you’ll want to save extra for later! 🍋
Key Ingredients & Substitutions
Graham cracker crumbs: This is the base of your crust. If you’re in a pinch, crushed digestive biscuits or vanilla wafers make great alternatives for similar flavors.
Sweetened condensed milk: It’s essential for that creamy filling. If you’re looking for a dairy-free option, try coconut cream for a different twist.
Key lime juice: While fresh key limes are the best, bottled key lime juice works just fine. Regular Persian limes can be an acceptable substitute but will yield a slightly different flavor.
Sour cream: This adds creaminess and a touch of tang. You can swap it with Greek yogurt for a healthier version, and it keeps the consistency similar.
Heavy cream: This is crucial for the whipped topping. If you want a lighter option, whipped coconut cream is a fantastic dairy-free substitute!
How Do I Ensure the Perfect Crust for My Key Lime Pie Bars?
The crust is the foundation of your Key Lime Pie Bars, and getting it right is key! Here are some tips:
- Mix the graham cracker crumbs, sugar, and melted butter until just combined—too much mixing can lead to a tough crust.
- Press the mixture firmly into the baking pan, using the bottom of a measuring cup for an even layer.
- Don’t skip baking the crust first. This helps set it, making it crispy and preventing it from getting soggy from the filling.
What’s the Best Way to Whip the Cream for Topping?
Whipping cream can be tricky, but with the right techniques, you’ll nail it every time!
- Make sure your heavy cream is cold; this helps achieve the best volume and texture.
- Use a clean mixing bowl and beaters; a little fat can prevent whipping.
- Start whipping on low speed to avoid splattering, then gradually increase to high speed once it begins to thicken.
- Stop whipping when stiff peaks form. Over-whipping can turn it into butter!
With these tips, you’re all set to make delicious Key Lime Pie Bars that everyone will love! Enjoy your baking!
How to Make Key Lime Pie Bars?
Ingredients You’ll Need:
For The Crust:
- 1 1/2 cups graham cracker crumbs
- 1/4 cup granulated sugar
- 1/2 cup unsalted butter, melted
For The Filling:
- 2 (14-ounce) cans sweetened condensed milk
- 1/2 cup sour cream
- 3/4 cup key lime juice (freshly squeezed, or bottled key lime juice)
- Zest of 2 limes
- 2 large eggs
For The Topping:
- 1 cup heavy whipping cream
- 1/4 cup powdered sugar
- Zest of 1 lime (for garnish)
How Much Time Will You Need?
This recipe requires about 15 minutes of preparation time, plus 8-10 minutes for baking the crust, another 15-20 minutes for the filling, and at least 4 hours to chill in the fridge. So overall, plan for roughly 4 hours and 45 minutes before you can enjoy your delicious bars! But most of that time is just waiting for it to chill.
Step-by-Step Instructions:
1. Prepping the Crust:
First, let’s get that oven going! Preheat your oven to 350°F (175°C). While it warms up, take an 8×8 inch baking pan and line it with parchment paper, leaving some hanging over the edges. This will help you lift out the bars later. In a medium bowl, mix the graham cracker crumbs, granulated sugar, and melted butter until it looks like wet sand. Press this mixture evenly into the bottom of your prepared pan—make sure it’s nice and firm!
2. Baking the Crust:
Now it’s time to bake the crust. Place the crust in the preheated oven for about 8 to 10 minutes until it’s lightly golden and smells fantastic. Once done, take it out and let it cool while you prepare the filling.
3. Making the Filling:
In a large mixing bowl, whisk together the sweetened condensed milk, sour cream, key lime juice, lime zest, and eggs. Make sure everything is mixed well and smooth. Pour this key lime filling over your cooled crust, spreading it out evenly. Pop it back into the oven for another 15 to 20 minutes. You want the edges to set, but the center should still jiggle a little—this is key to the perfect consistency!
4. Cooling and Chilling:
Once the filling is baked, let it cool to room temperature. Then, cover it up and place it in the refrigerator. You’ll want to let it chill for at least 4 hours, or longer if you can wait. This step is what makes those flavors come alive!
5. Preparing the Topping:
When your key lime bars are fully chilled and you’re ready to enjoy, let’s make the topping! In a mixing bowl, whip the heavy cream with powdered sugar until it forms stiff peaks. You want it fluffy and light. Spread the whipped cream generously over the cooled filling.
6. Finishing Touches:
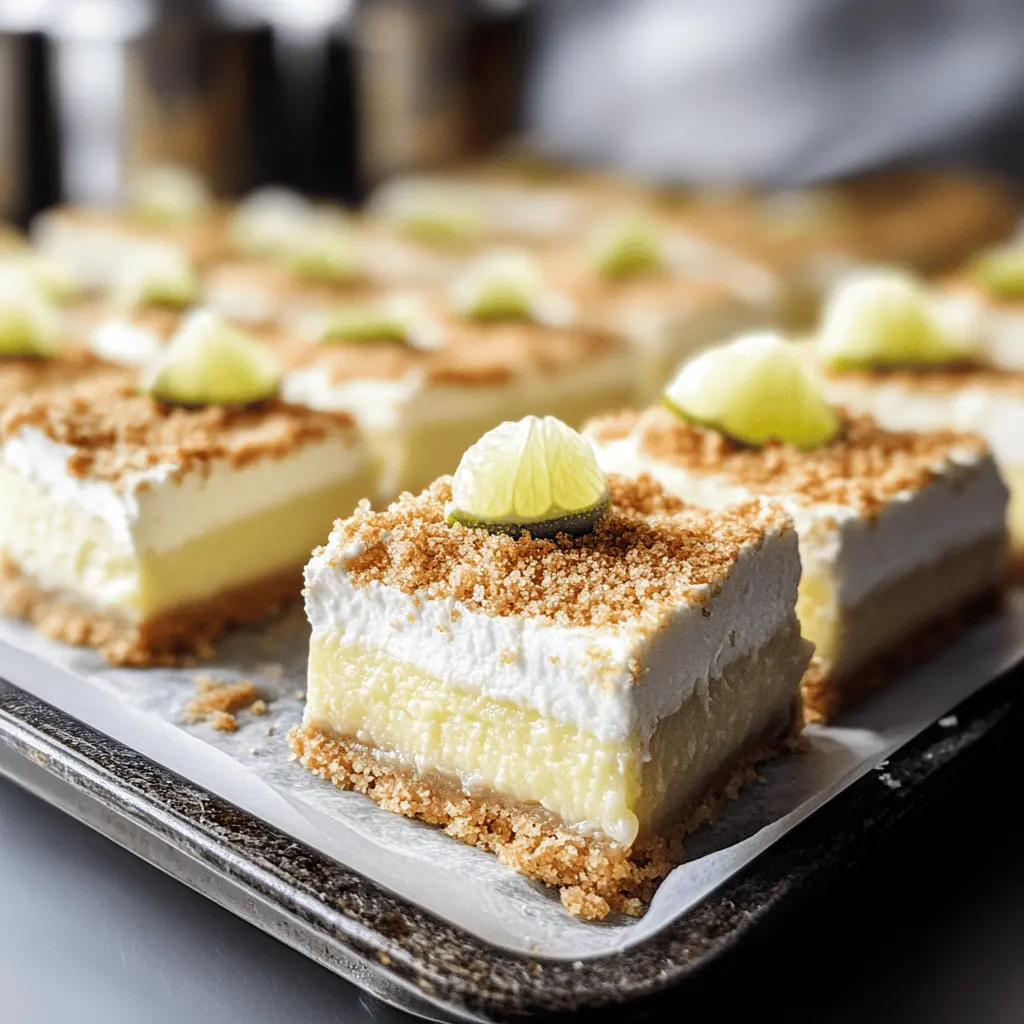
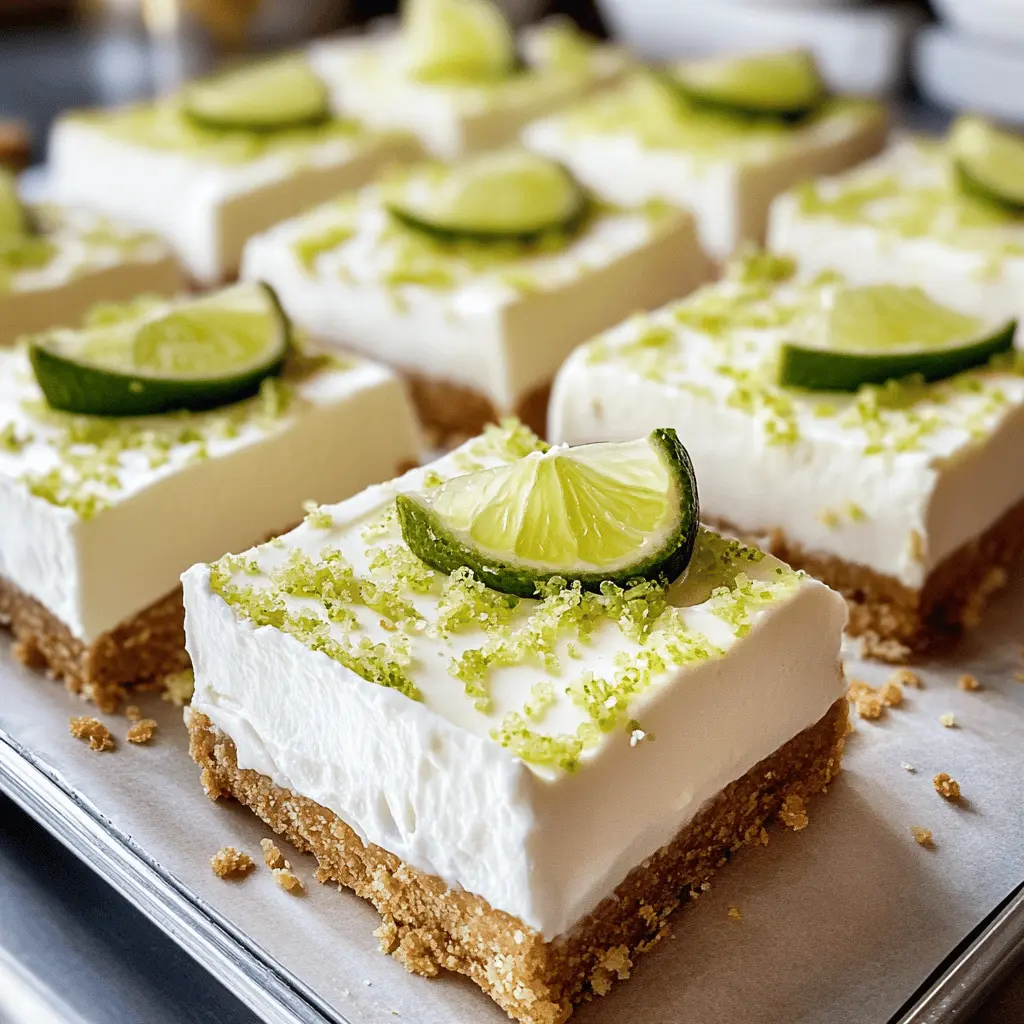
To make your bars look even more special, sprinkle some additional lime zest on top for garnish. Now, carefully cut the dessert into bars, and serve chilled. Enjoy your delightful Key Lime Pie Bars! They’re perfect for a warm day or any time you need a tasty treat.
Can I Use Regular Limes Instead of Key Limes?
Absolutely! While key limes have a unique tartness, regular limes can also work well. You may want to adjust the sugar slightly if the regular limes seem sweeter. The same amount of juice can be used, just be sure to use lime zest for that citrusy aroma!
Can I Make the Crust Gluten-Free?
Yes! Simply swap out the graham cracker crumbs for a gluten-free alternative. Look for gluten-free graham cracker crumbs or even crushed gluten-free cookies. The rest of the recipe remains the same!
How Should I Store Leftover Key Lime Pie Bars?
Store leftovers in an airtight container in the fridge for up to 5 days. To keep the crust from getting soggy, it’s best to store the crust and filling separately if possible. Just be sure to add the whipped cream topping right before serving!
Can I Freeze Key Lime Pie Bars?
Yes, you can freeze these bars! Wrap them tightly in plastic wrap or foil, then place them in an airtight container. They’ll keep well in the freezer for up to 3 months. Thaw overnight in the refrigerator before serving and re-whip the cream topping if necessary.