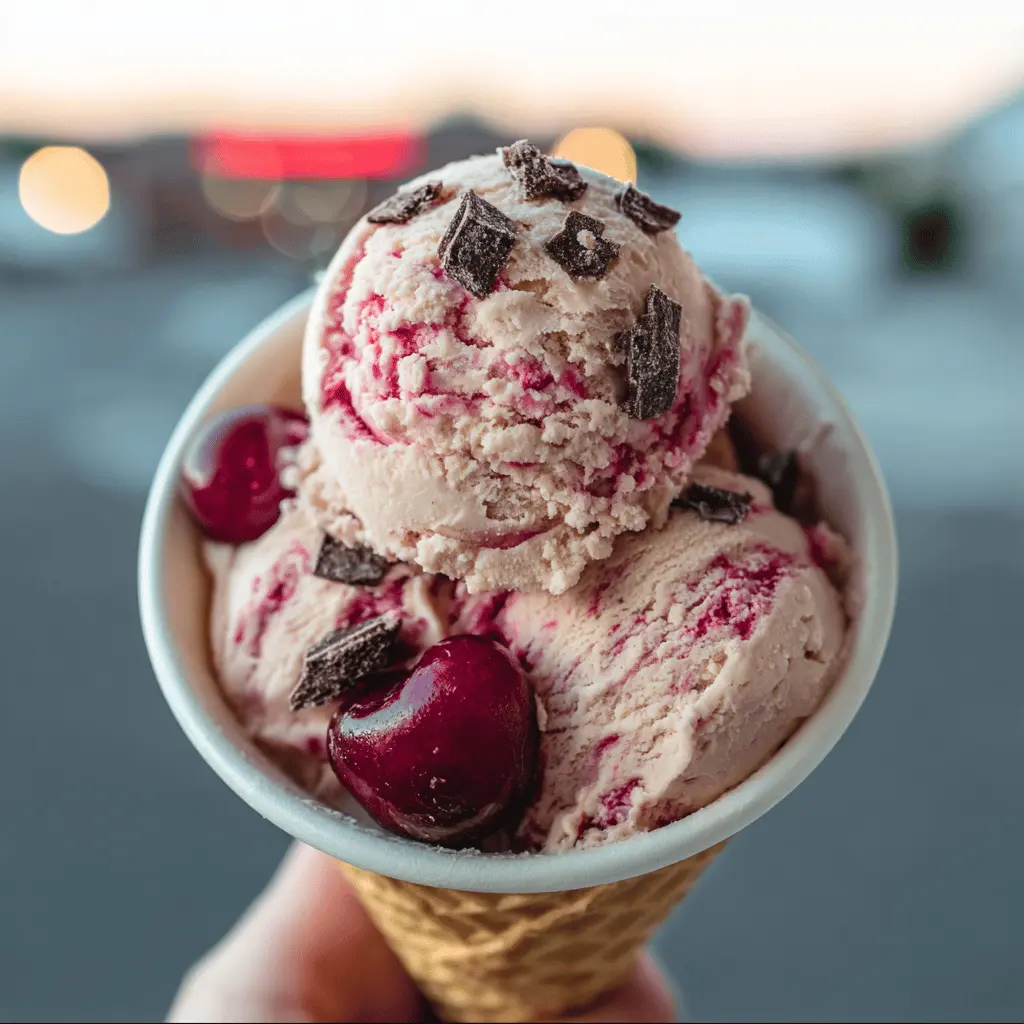
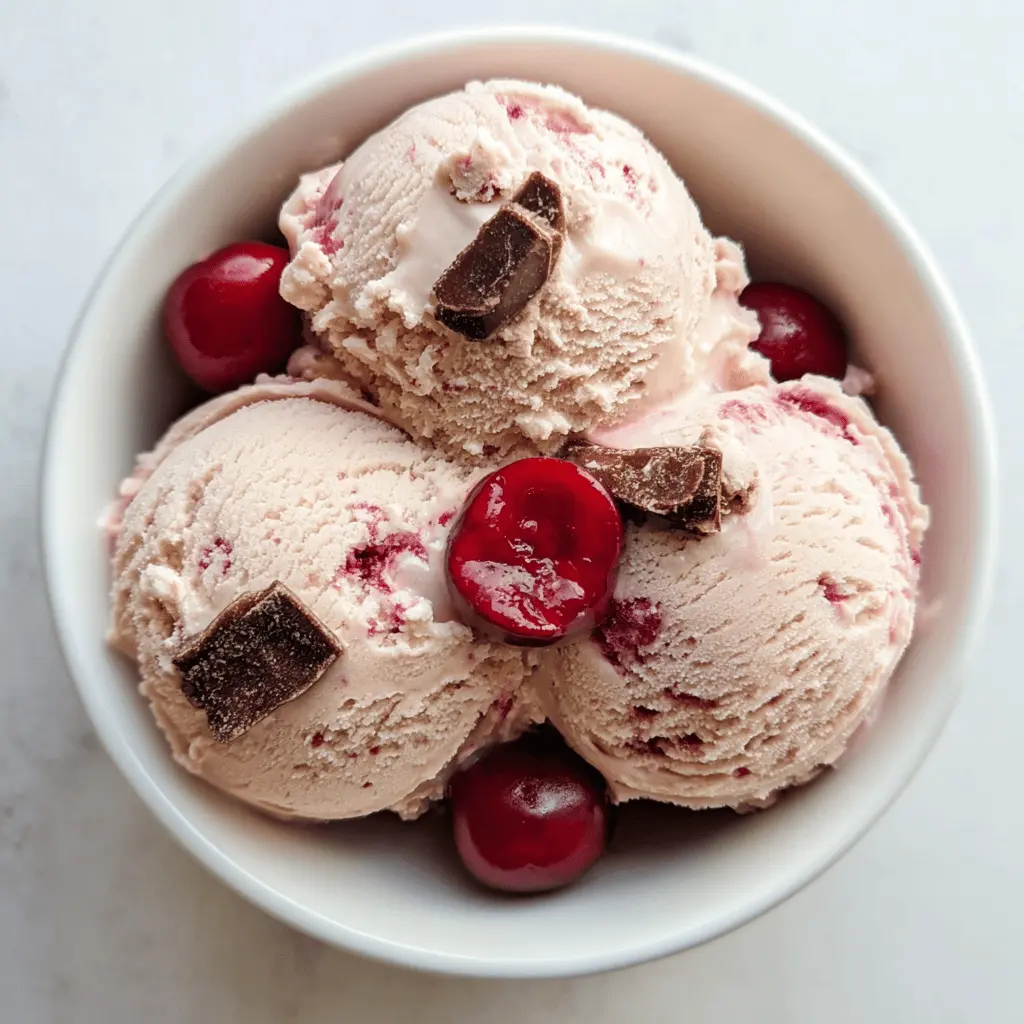
This Easy Homemade Cherry Garcia Ice Cream is a creamy, dreamy treat! With sweet cherries and rich chocolate chunks, it’s perfect for hot days or a cozy movie night.
You won’t believe how simple it is to whip up! Just mix, freeze, and enjoy. I love leaving a few extra cherries on top because, let’s be honest, they’re the best part! 🍒
Key Ingredients & Substitutions
Heavy Cream: This gives the ice cream its rich and creamy texture. You could substitute it with coconut cream for a dairy-free version, though the flavor will change slightly.
Whole Milk: Gives a smoother consistency. If you need a lighter option, consider using 2% milk or almond milk, but the creaminess will be reduced.
Granulated Sugar: Regular sugar works perfectly, but you could use brown sugar for a deeper flavor or a sugar substitute like honey or maple syrup to cut down on refined sugars.
Cherries: Fresh sweet cherries are ideal, but frozen cherries are a great alternative. If cherries are out of season, use mixed berries for a fun twist!
Chocolate Chunks: While semi-sweet chocolate is traditional, dark chocolate or even white chocolate can be used to suit your taste. Carob chips are a good alternative as well.
How Do I Get a Creamy Texture in Homemade Ice Cream?
Getting that creamy texture is key in homemade ice cream, and it starts with the base. Here are some tips to make sure your ice cream turns out smooth:
- Whisk the cream and milk together well to fully dissolve the sugar.
- Churn slowly in your ice cream maker. This incorporates air, making it fluffy.
- Don’t skip the chill time! Freezing it for several hours lets it firm up nicely.
Enjoy scooping your homemade Cherry Garcia, and feel free to mix in extra goodies like nuts or marshmallows for added fun!
Easy Homemade Cherry Garcia Ice Cream
Ingredients You’ll Need:
- 2 cups heavy cream
- 1 cup whole milk
- 3/4 cup granulated sugar
- 1 teaspoon vanilla extract
- 1 cup fresh or frozen pitted cherries, chopped
- 1/2 cup chocolate chunks or chips
- 1 tablespoon lemon juice (optional, to brighten cherry flavor)
- Pinch of salt
How Much Time Will You Need?
This recipe takes about 10-15 minutes to prepare, plus at least 3-4 hours of freezing time. It’s a simple process that will leave you with a delightful homemade treat!
Step-by-Step Instructions:
1. Mix the Base:
In a large mixing bowl, whisk together the heavy cream, whole milk, granulated sugar, vanilla extract, lemon juice (if you’re using it), and a pinch of salt. Keep whisking until the sugar is fully dissolved, making the mixture smooth and creamy.
2. Churn the Ice Cream:
Pour your creamy mixture into an ice cream maker. Follow the manufacturer’s instructions to churn the ice cream until it reaches a soft-serve consistency. This usually takes about 20-30 minutes, depending on your machine.
3. Add Cherries and Chocolate:
When the ice cream is nearly done churning (about 5 minutes before you stop), carefully add in the chopped cherries and chocolate chunks. This will help them mix evenly throughout your ice cream.
4. Freeze Until Firm:
Once the churning is complete, scoop the ice cream into an airtight container. Make sure the lid is sealed tightly and place it in the freezer for at least 3-4 hours. This step is important for getting a nice firm texture!
5. Serve and Enjoy:
When you’re ready to enjoy, take out your ice cream and scoop it into bowls. You can garnish with a few extra cherries and chocolate chunks on top for an extra touch. Dive in and relish this delicious Cherry Garcia treat!
Enjoy your delicious, creamy, cherry and chocolate-packed Cherry Garcia ice cream!
FAQ for Easy Homemade Cherry Garcia Ice Cream
Can I Use Frozen Cherries Instead of Fresh?
Absolutely! Frozen cherries work great in this recipe. Just make sure to thaw and chop them before adding to the ice cream maker for the best distribution of flavor.
What If I Don’t Have an Ice Cream Maker?
No problem! You can still make this ice cream without one. Simply pour the mixture into a shallow dish and place it in the freezer. Every 30 minutes, stir it with a fork to break up ice crystals until it’s firm, which usually takes about 4-6 hours.
How Should I Store Leftover Ice Cream?
Store any leftover ice cream in an airtight container in the freezer. To keep it as fresh as possible, press a piece of plastic wrap directly on the surface before sealing the container. It will last for about 1-2 weeks, but it’s best enjoyed sooner!
Can I Make This Recipe Dairy-Free?
Yes! Substitute the heavy cream and whole milk with coconut cream and almond milk, respectively. Use dairy-free chocolate chunks as well for a completely dairy-free version of this delightful treat!