This homemade cherry pie is a treat you’ll love! With its sweet cherry filling and a flaky crust, it’s perfect for any dessert lover. Plus, it’s easy to whip up with just a few ingredients!
Who can resist a slice of warm cherry pie with a scoop of ice cream? 🙋♂️ I always bake extra just to enjoy the delicious leftovers—I mean, who needs to share, right?
This recipe is super simple, making it a great choice for family gatherings. Just mix those cherries with sugar, pour into the crust, bake, and enjoy a slice of happiness!
Key Ingredients & Substitutions
Cherries: Fresh or frozen, both work great! If using frozen, let them thaw and drain excess liquid before using. If cherries are out of season, you can also use canned cherries, but be sure to reduce sugar since they’re usually sweetened.
Sugar: You can adjust the sugar based on how sweet the cherries are. For a healthier option, try using honey or maple syrup as a substitute, but keep in mind it may change the texture of the filling slightly.
Cornstarch: This is important for thickening the pie filling. If you need a gluten-free option, you can substitute with arrowroot or tapioca starch, which work just as well!
Pie crust: Store-bought crusts are quick and easy. If you prefer, make your own with flour, butter, and water. You can also use a graham cracker crust for a fun twist on the classic.
How Do I Create the Perfect Pie Crust?
The crust is key to a good cherry pie! Here’s how to make it flaky and delicious:
- If you’re making a homemade crust, keep your ingredients cold (especially the butter). This helps create those flaky layers.
- Roll out the dough on lightly floured parchment paper; this makes transferring to the pie dish easier.
- Don’t stretch the dough when fitting it in the pie dish; just gently press it down to avoid cracks.
Once you add the filling, sealing the edges properly is crucial to keep everything in. Crimping with your fingers or a fork adds a nice touch and keeps it secure!
With these tips, your cherry pie will be a hit every time. Enjoy your baking!
Easy Best Homemade Cherry Pie
Ingredients You’ll Need:
- 4 cups fresh or frozen pitted cherries
- 1 to 1¼ cups granulated sugar (adjust based on cherry sweetness)
- ¼ cup cornstarch
- 1 tablespoon lemon juice
- 1 teaspoon vanilla extract (optional)
- 1 pinch salt
- 2 tablespoons unsalted butter, cut into small pieces
- 1 package refrigerated pie crusts (2 crusts) or homemade pie crust
How Much Time Will You Need?
This cherry pie takes about 20 minutes to prepare and then about 1 hour to bake. Plus, you’ll want to let it cool for at least 2 hours before serving. So set aside around 3 hours total, and you’ll have a gorgeous pie ready to enjoy!
Step-by-Step Instructions:
1. Preheat the Oven:
Start by preheating your oven to 425°F (220°C). This will ensure your pie bakes evenly and gets a nice golden crust.
2. Prepare the Cherry Filling:
In a large mixing bowl, combine the pitted cherries with the sugar, cornstarch, lemon juice, vanilla extract (if using), and a pinch of salt. Gently stir everything together to make sure the cherries are well coated. This will create a deliciously sweet filling!
3. Roll Out the Crust:
Take one pie crust and roll it out to fit a 9-inch pie dish. Carefully place it in the dish, pressing it into the bottom and up the sides. Trim any excess dough hanging over the edges, but leave a little to crimp later.
4. Add the Cherry Filling:
Pour the cherry mixture into the crust, spreading it out evenly. Dot the top with small pieces of unsalted butter to add a rich flavor.
5. Cover the Pie:
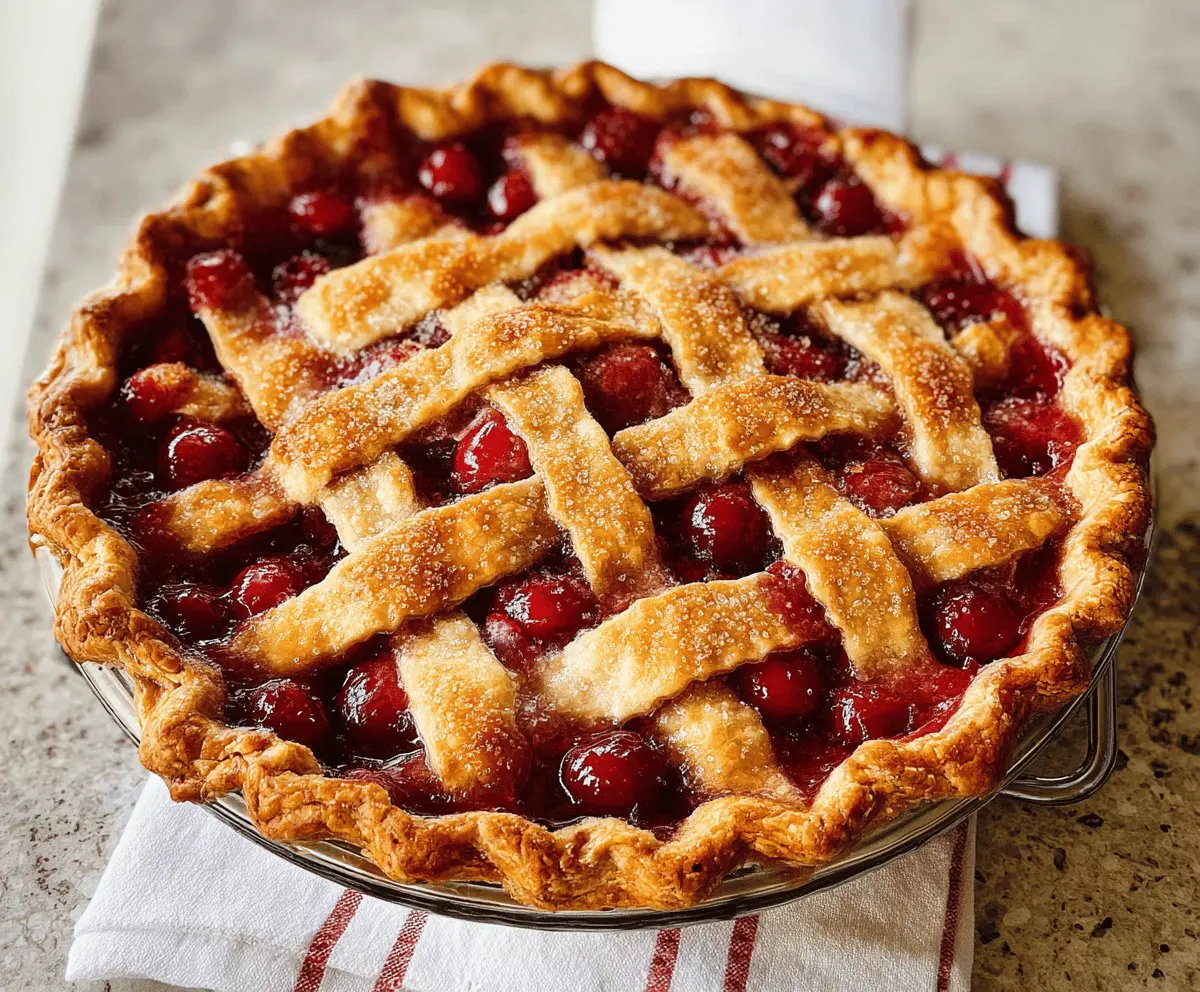
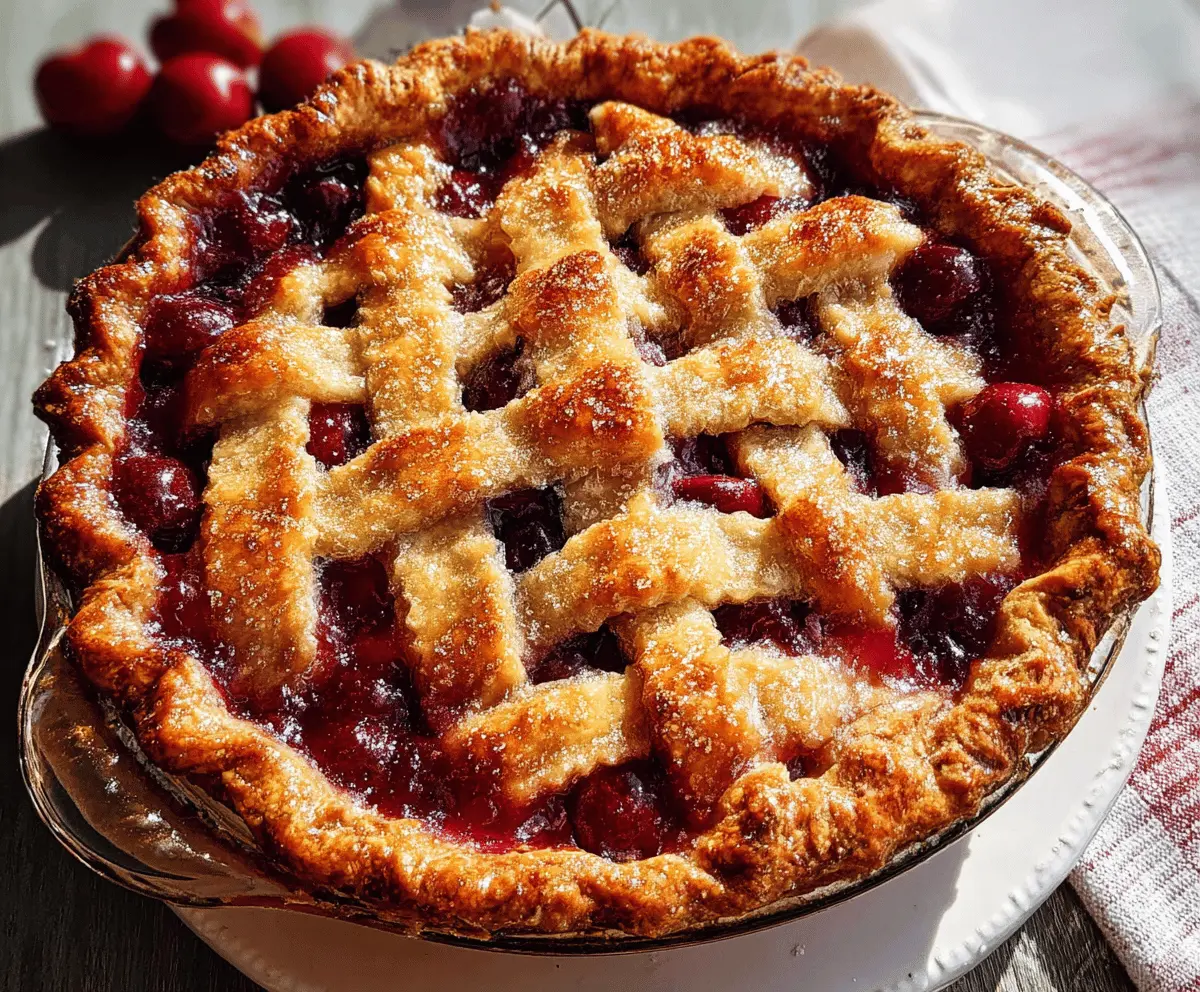
Roll out the second pie crust to cover the filling. You have two options here: you can place it whole with some slits cut into it for steam to escape, or make a decorative lattice pattern with strips of dough woven on top. Get creative!
6. Seal and Crimp Edges:
Trim any excess dough, then fold the edges over and crimp them to seal the pie. Make sure it’s well sealed so the filling stays inside while baking.
7. Brush and Bake:
If you want, brush the top crust with a little milk or beaten egg and sprinkle some sugar on top for a beautiful finish. Place your pie on a baking sheet to catch any drips, and then bake in the oven for 15 minutes at 425°F.
8. Reduce Temperature:
After 15 minutes, reduce the temperature to 350°F (175°C) and continue baking for 35 to 40 minutes. You’ll know it’s ready when the crust is golden brown and the filling is bubbling.
9. Cool and Serve:
Once baked, remove the pie from the oven and let it cool on a wire rack for at least 2 hours. This helps the filling set up. Serve slices warm or at room temperature, and don’t forget the vanilla ice cream or whipped cream on the side!
Enjoy your delicious, flaky cherry pie with its sweet and juicy filling! 🍒🥧
FAQ for Easy Best Homemade Cherry Pie
Can I Use Frozen Cherries Instead of Fresh?
Absolutely! Frozen cherries work just as well for this recipe. Just make sure to thaw them first and drain any excess liquid to prevent a watery filling.
How Can I Make the Pie Filling Thicker?
If you find the filling is too runny, you can add an extra tablespoon of cornstarch to help thicken it up. Just combine it with the sugar before mixing it into the cherries.
Can I Make the Pie Crust Ahead of Time?
Yes! You can prepare the pie crust ahead of time and store it in the fridge for up to 3 days or freeze it for up to a month. Just make sure it’s well wrapped to prevent drying out.
What’s the Best Way to Store Leftover Cherry Pie?
Store any leftovers in an airtight container at room temperature for up to 2 days, or in the fridge for up to 5 days. To reheat, simply warm individual slices in the oven or microwave.